- No products in the cart.
 USA
USA CA
CAHow to Take a Great Employee ID Photo
17
Nov
It's the most important aspect of any student ID card, employee badge or other ID credential, yet it's the aspect that gives organizations the most trouble: the photo!
On the surface, taking a photo seems like it should be easy: just point the camera at the subject, press the button, put the file on a computer, crop it to fit and voilà — an ID photo!
However, anyone who has ever tried to take an employee ID photo knows that's never how it works.
There's always something that comes up:
- "Why do I look like a ghost?!?"
- "What's with all the shadows?"
- "Ugh, I have red eye!"
It's OK to admit it: taking a good employee ID photo is hard.
However, there are a few tips and tricks you can use to drastically cut down on the number of re-shoots you need to do, making those days of "selfie" photo ID badges a distant memory.
You don't need to be a pro to get professional-quality shots
The tips below come from a blend of sources, including personal experience with our own photo ID cards and advice we've gleaned from photographers over the years.
Keep in mind that, as we frequently state, there are few "one size fits all" solutions in the ID world: some organizations may want to get a little crazy with their credentials and go with employee selfies as ID photos, while others want a serious photo.
Our goal with this list is to help you identify areas of weakness in your photo-taking process and to offer solutions on how to address them, giving you a better shot at getting that perfect ID photo the first time.
1. Get the lighting right
Whether you're shooting employee ID photos or taking pictures of a beautiful landscape, there's a golden rule in photography: lighting is king.
When taking employee ID photos, it's not terribly likely that your first thought is "OK, what kind of lighting am I going to use?"
Lighting tends to be an afterthought with ID photos, and is a leading cause of several common photo problems.
Most offices are going to have overhead fluorescent lights. You might be tempted to think those are good enough, but think again — fluorescent lights often lead to harsh, washed out images with an unrealistic white balance.
You can also try to use natural light from windows, but that can be unreliable: you don't want an ID shoot put on hold because it's cloudy.
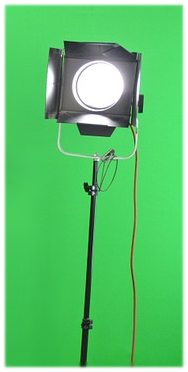
If you're going to be taking employee ID photos regularly, it's probably worth the money to invest in a lighting kit like the one seen to the right. This allows you to set up the lighting and play around with the angles to get the look you're going for in your photos.
There are a variety of different lighting techniques you can use, from "Butterfly" to "Rembrandt," all depending on what you're going for.
However, one thing is clear: once you see how a photo looks with professional-grade lighting, you won't want to go back to relying on sunlight.
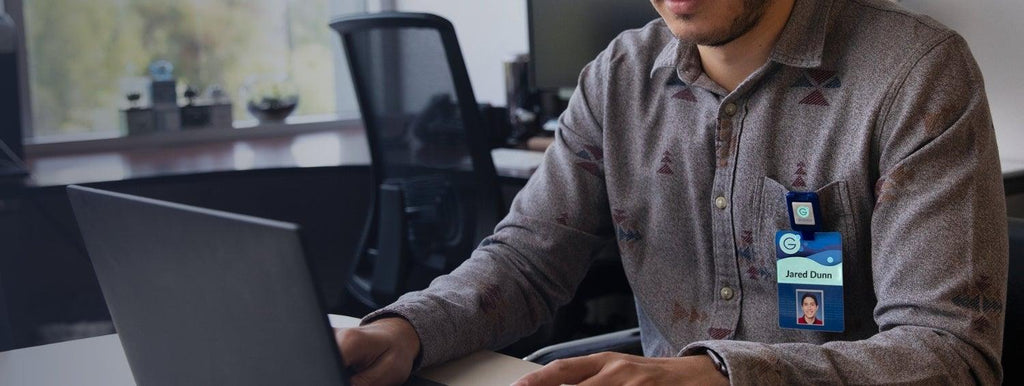
2. Use a neutral background
When looking at an ID badge, the viewer's main focus will be on the person in the photo. However, what frames that photo is almost as important as the quality of the photo itself: the background.
A good background helps emphasize the face of the person standing in front of it. You want your background to add something to the photo, not take attention away from the employee or student pictured.
For this reason, it's a good idea to use neutral, subtle backgrounds for your photos. Think soft blues or subtle patterns, not lime green or magenta.
Many people want their backgrounds to reflect their work; this isn't necessarily a problem, but needs to be done carefully.
For example, if you work in an office and want an office-themed background, consider blurring the background a bit so the viewer gets the general idea without seeing all of the detail.
This will add a little detail to your photo without overwhelming the viewer.
3. Use a tripod
Yes, you have a very steady hand. We believe you!
However, it's always a good idea to invest in a tripod for your employee photos. It will drastically lower the risk of ending up with a blurry photo from a subtle shaking of the hand.
A tripod also allows you to set up your subject and then adjust other aspects of your shot, like the lighting or the subject's hair, without losing your set-up.
Without a tripod, any adjustments would involve putting down the camera, making the changes, then coming back to re-frame your shot, re-focus the camera, etc.
A good tripod saves you both time and effort, all while providing a better overall photo.
4. Shoot at an angle
No one wants a mug shot on their ID badge!
Photos shot straight on often look awkward and forced, kind of like the subject is a deer caught in a pair of headlights. You want photos of your employees to make them look relaxed, not like they were forced to be there!
Using angles in your photos helps give the photo a more natural look.
It's recommended to shoot from a slight downward angle, as it helps make the face look more natural and avoids any under-chin shots.
You can also play with angles by having the subject's face turned at a slight angle towards the camera, making the photo more "hi, I like my job" and less "you have one phone call!"
5. Smile!
We know it's work, but you want your employees to look happy!
ID badges with photos that feature blank stares or slight frowns can send the wrong message about your organization: "gee, why is the guy in that ID photo so mad? He must hate his job!"
Interested in re-shooting your employee ID photos? Make sure you have the necessary supplies! We offer a variety of ID card stock, photo ID software, ID card printers, supplies and more.